E-mail Configuration
How to Read Your E-Mail
You can access your e-mail using IMAP4 or POP3. Check configurations for the following email clients:


Generic Configuration for IMAP4 or POP3
- Username: the user part of your email address (e.g., someone@dei.uc.pt → someone)
- Server:
- eden.dei.uc.pt - Teachers, postgraduate students, and researchers
- student.dei.uc.pt - Students
- IMAP4: SSL/TLS on port 993
- POP3: SSL/TLS on port 995
How to Send E-Mail
Use the SMTP server smtp.dei.uc.pt. This server supports:
- Virus filtering
- SPAM message classification
- STARTTLS/SSL
- SMTP authentication (SMTP AUTH)
- Relaying to authenticated clients
- Attachment limit: 60 MB
SMTP Ports:
- SSL: port 465
- Submission: port 587
Storing SPAM on the Server
Use procmail to store messages tagged as SPAM in a separate file as they arrive. Create ~/.procmailrc:
:0 H
* ^Subject:.*\{Spam\?\}
{
  :0
  mail/spam
}
Set permissions:
chmod 600 ~/.procmailrcMake sure mail/spam is listed in .subscriptions to subscribe via IMAP or webmail.
Forwarding Email
Edit ~/.forward (or via webmail) with:
user@domain.com, \loginSet permissions:
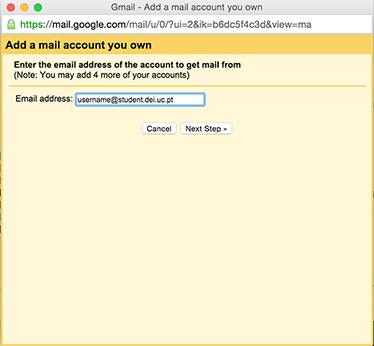
chmod 600 ~/.forwardGoogle Gmail Configuration
-
Open Gmail > Settings > Accounts and Import > Add a POP3 mail account you own.
-
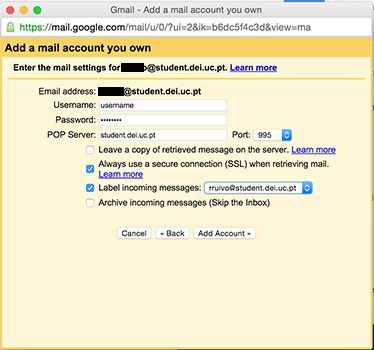
Enter your DEI login and password, select Label incoming messages, and click Add Account.
-
Under Send mail as, click Add another email address, enter your name and DEI email, then click Next Step.

-
Enter SMTP server
smtp.dei.uc.pt, your login and password, then click Add Account.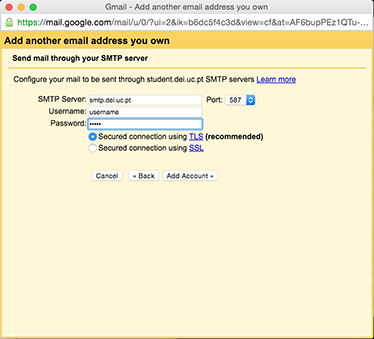
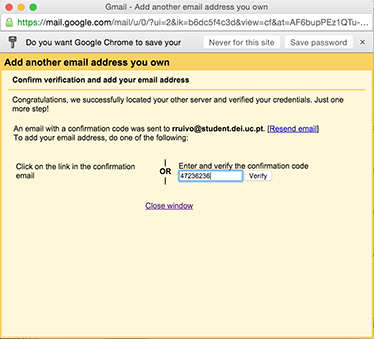
-
Verify the code sent to your DEI email and click Verify.
Microsoft Outlook Configuration
-
In Outlook, go to Tools > Account Settings > New > POP/IMAP.
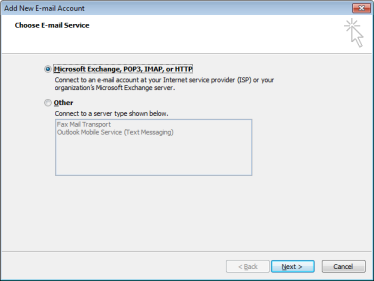
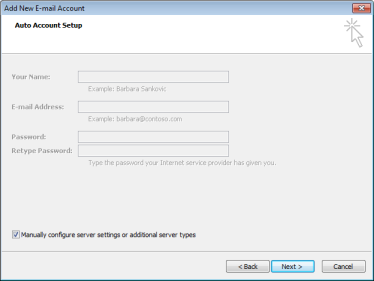
-
Select Manually configure server settings and click Next.
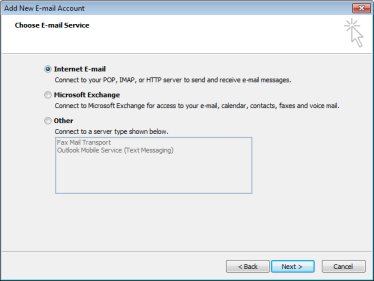
-
Choose Internet E-mail and click Next.
-
Enter account details and click More Settings....

-
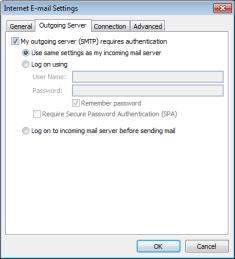
On the Outgoing Server tab, enable SMTP authentication.
-
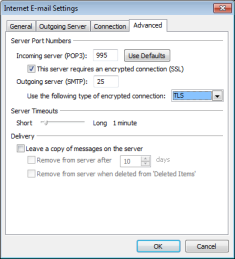
On the Advanced tab, set:
- Incoming (IMAP): SSL on port 993
- Outgoing (SMTP): TLS (or SSL) on port 465/587
Mozilla Thunderbird Configuration
-
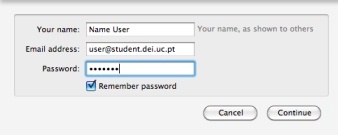
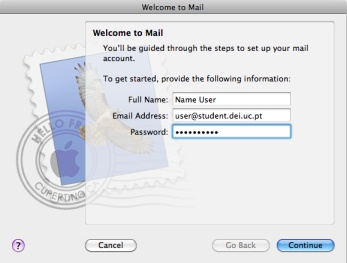
In Thunderbird, go to Tools > Account Settings > Account Actions > Add Mail Account. Enter your details and click Continue.
-
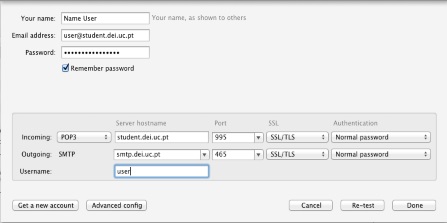
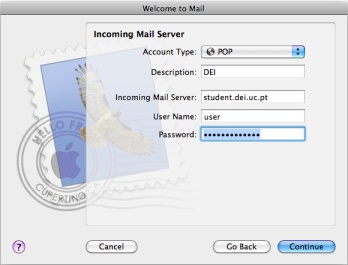
Click Manual Configuration, enter server settings, then Re-test and Done.
-
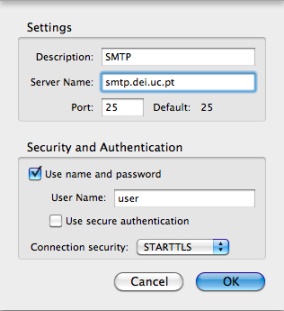
Under Outgoing Server (SMTP), click Edit....
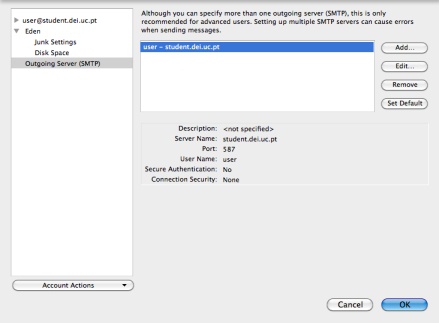
-
Use STARTTLS (or SSL) for Connection security, adjust ports, then click OK.
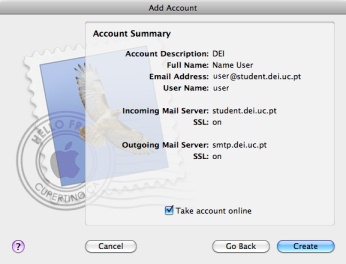
Apple Mail Configuration
-
In Apple Mail, go to File > Add Account > Continue.
-
Enter incoming server details, accept the certificate, and click Continue.
-
Enter outgoing server details and click Continue.

-
Review the Account Summary and click Create.