VPN access
VPN Overview
Virtual Private Network (VPN) creates a secure connection, called a tunnel, between your computer and the DEI campus. This tunnel allows secure communications and the ability to extend local network access to offsite locations.
When do I need a VPN connection?
- If you are off-site and need to access a service that is restricted by IP address (e.g., www.springerlink.com).
- If you are accessing a service which exists only on a restricted subnet.
Cannot connect in Windows?
Sometimes some home routers and popular Anti-Virus block L2TP/IPSec connections preventing you from connecting to the VPN Service properly.
If you are having problems, try OpenVPN for Windows.
# Notice 2021 - Mac OSX 11 Big Sur (or a higher version)
If your Mac runs OSX 11 Big Sur (or a higher version), then OpenVPN doesn't work due to limitations imposed by System Integrity Protection. Disabling SIP will make OpenVPN work again, but it's a security risk and the Helpdesk does not advise this. Alternatively, you can use IPSEC + L2TP mode, which works on the new version of MacOS.
Apple Mac OSX (IPSEC + L2TP)
|
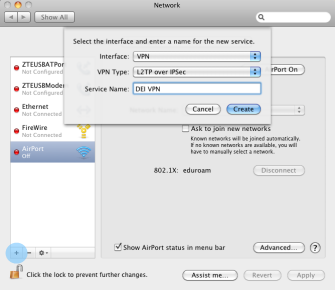
1. Open Network Preferences: System Preferences -> Network Click the "+" button. Select "VPN" as interface and "L2TP over IPSec" as VPN type. Name the service and click "Create". |
 |
|
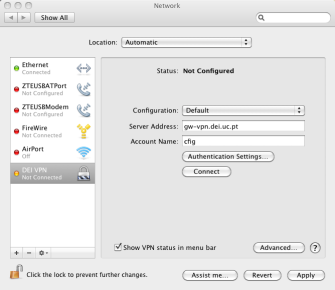
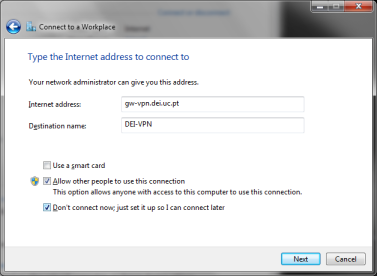
2. Type Server Address: gw-vpn.dei.uc.pt and Account Name (DEI username). Click "Advanced...". |
 |
|
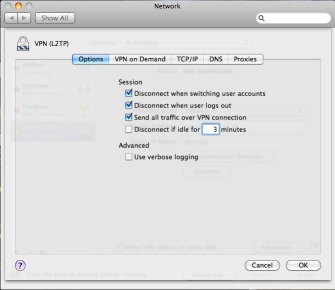
3. Enable "Send all traffic over VPN connection". Click OK. Then click "Authentication Settings...". |
 |
|
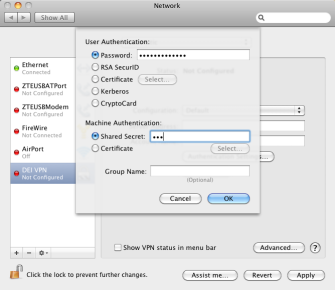
4. Enter DEI password and Shared Secret: dei. Then click "Connect". |
 |
Mac OSX (OpenVPN)
- Install Tunnelblick from https://tunnelblick.net/downloads.html
- Copy DEI_VPN.zip to your Mac and unzip
- Double-click on "DEI VPN.tblk"
- Start Tunnelblick. Click the menu icon, then "Connect DEI VPN"
- Enter DEI credentials when prompted
Windows 7/10 (L2TP/IPSec)
|
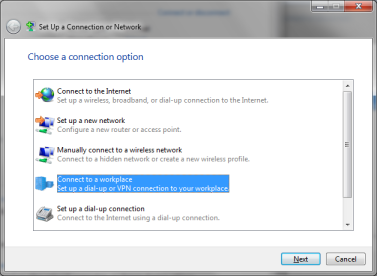
1. Go to Control Panel → Network and Sharing Center → Set up a new connection or network Select "Connect to a workplace" Windows 10: Control Panel → Network and Internet → Network and Sharing Center |
 |
|
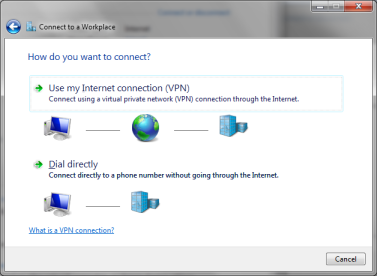
2. Select "Use my Internet connection (VPN)" |
 |
|
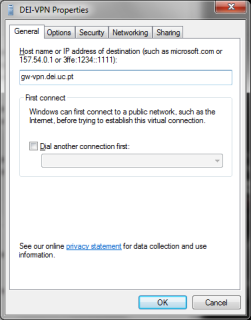
3. Specify the following:
|
 |
|
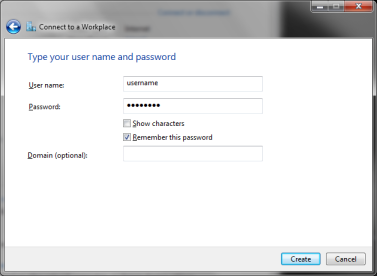
4. Enter your DEI username and password (without domain) |
 |
| 5. Close this window | 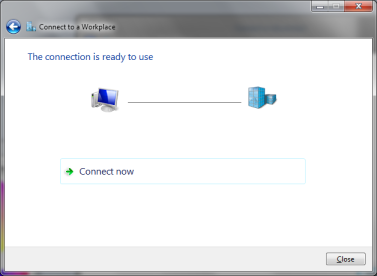 |
|
6. Go to Network Connections and right-click the VPN → Properties |
 |
|
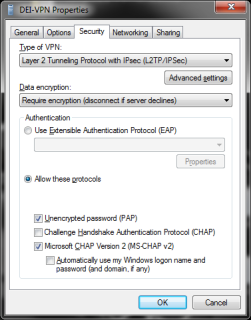
7. In Security tab:
|
 |
|
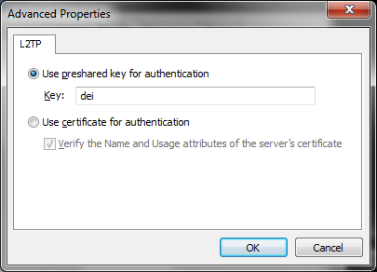
8. Click Advanced, enter pre-shared key: dei. Confirm and finish. More help: Microsoft KB926179 |
 |
Windows 7/10 (OpenVPN)
- Install OpenVPN Client from https://openvpn.net/community-downloads/
- Download and unzip openvpn.zip
- Move
GEANT-CA.crtandclient.ovpntoC:\Program Files\OpenVPN\config\orC:\Users\username\OpenVPN\ - Start OpenVPN GUI → right click icon → Connect
- Use only the username (no @dei.uc.pt or @student.dei.uc.pt)
Linux
|
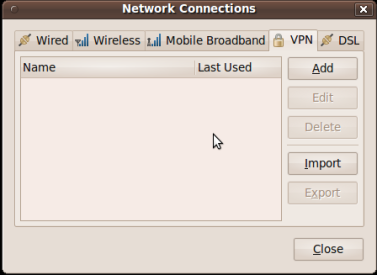
1. Install OpenVPN support:
Open Network Manager → VPN tab → Add |
 |
|
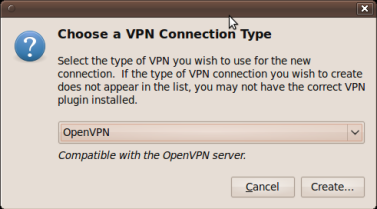
2. Choose VPN Type: OpenVPN → Create |
 |
|
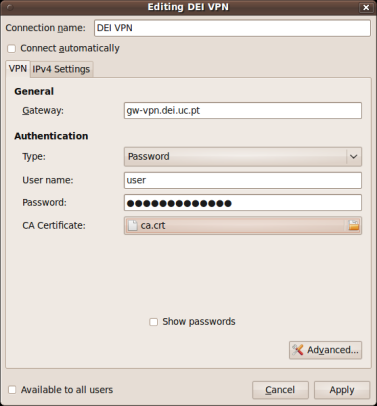
3. Fill in:
Click Advanced |
 |
|
4. In Advanced:
|
Android (OpenVPN)
Connecting via OpenVPN on Android is not possible with the official client. Use the paid alternative version or configure IPSEC.
Android (IPSEC)
|
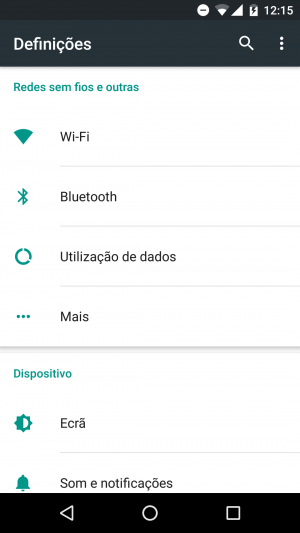
1. Go to Android settings → More → VPN |
 |
|
2. Tap "+" in the top-right corner |
 |
|
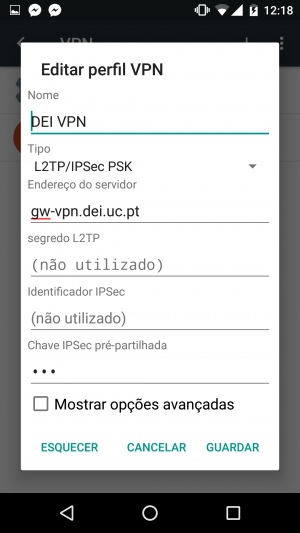
3. Configure VPN. Pre-shared key: dei |
 |
|
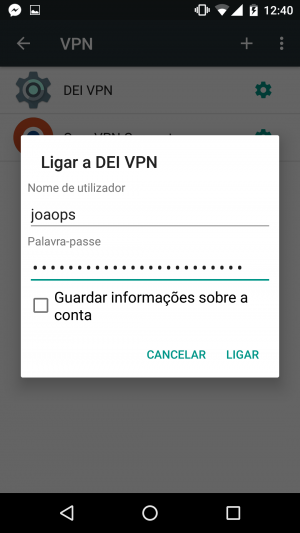
4. Select connection and enter DEI credentials (no domain) |
 |